
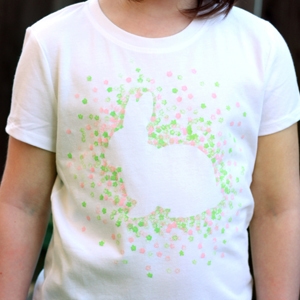
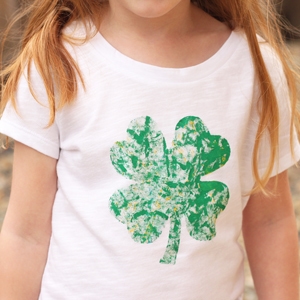
Last year I made these really cute St. Patrick’s Day shirts that I stenciled with vinyl. I’m sad that the kids grew out of them. This year, I did something different and used freezer paper. If you’ve never done freezer paper stenciling, you are in for a treat! No fancy cutting machines or vinyl required. And I’m especially loving Audrey’s DIY St. Patrick’s Day shirt this year because I got to try out pencil eraser stamping! I even made a video to show you the process. You can find that below. Also click here to take a look at these marble painted shirts!

– a shirt
– Freezer Paper (found mine at the grocery store)
– fabric paint
– pencil with an unused eraserLet’s get started!Trace the clover shape on the NON-shiny side of a piece of freezer paper.

Cut out the clover shape. If you were doing a more intricate design, you could use an X-Acto knife, but scissors worked fine here.

Put the clover, shiny side down, on your shirt. Iron it on.

Steal a pencil from your son (ssshhhh…. he has so many, he won’t notice). Dip the eraser in green paint and start stamping around the clover. Make sure to put another piece of freezer paper inside the shirt to keep the paint from leaking through.

I put the dots closer together around the clover and then gradually faded them out.

Let the paint dry and peel off the freezer paper. Follow the instructions on your paint to heat set it (usually this involves ironing or throwing it in the dryer). There you go! Cute and simple! You’ve got a fun DIY St. Patrick’s Day shirt.


You might also like these other fun crafts:


And make sure you check out these other great St. Patrick’s Day projects from some of my favorite bloggers! I’m seriously loving these!

1) Erin Go Braugh Wreath by Whistle and Ivy
5) DIY Green Ombre Shirt by Homemade Ginger
Lisa
Sunday 23rd of February 2020
Hi. What paint are you using?
Jessica @ Cutesy Crafts
Tuesday 25th of February 2020
Tulip Matte Fabric Paint
Lisa Haeck
Wednesday 1st of August 2018
Love the idea can you tell me an estimation of the size of templates you use for the kids shirt. Thanks!
Jessica @ Cutesy Crafts
Wednesday 8th of August 2018
I'm not sure, but there is a link to download my template for free. You should be able to measure it from there if you wanted to make a different shape.
Vickie Butner
Tuesday 3rd of March 2015
Thank you! My scouts loved doing this. We did a butterfly pattern. Now they have a shirt to wear when we all go places together.
Jennie M
Thursday 26th of February 2015
So cute! What kind of paint did you use?
Jessica @ Cutesy Crafts
Friday 27th of February 2015
Any fabric paint will work. I used Tulip soft matte fabric paint for this.
Bree
Monday 23rd of February 2015
We had a snow day here and my girls made their own clover tshirts. They turned out so cute! What a fun idea!
Jessica @ Cutesy Crafts
Friday 27th of February 2015
Thanks! Glad they had fun making them. :)