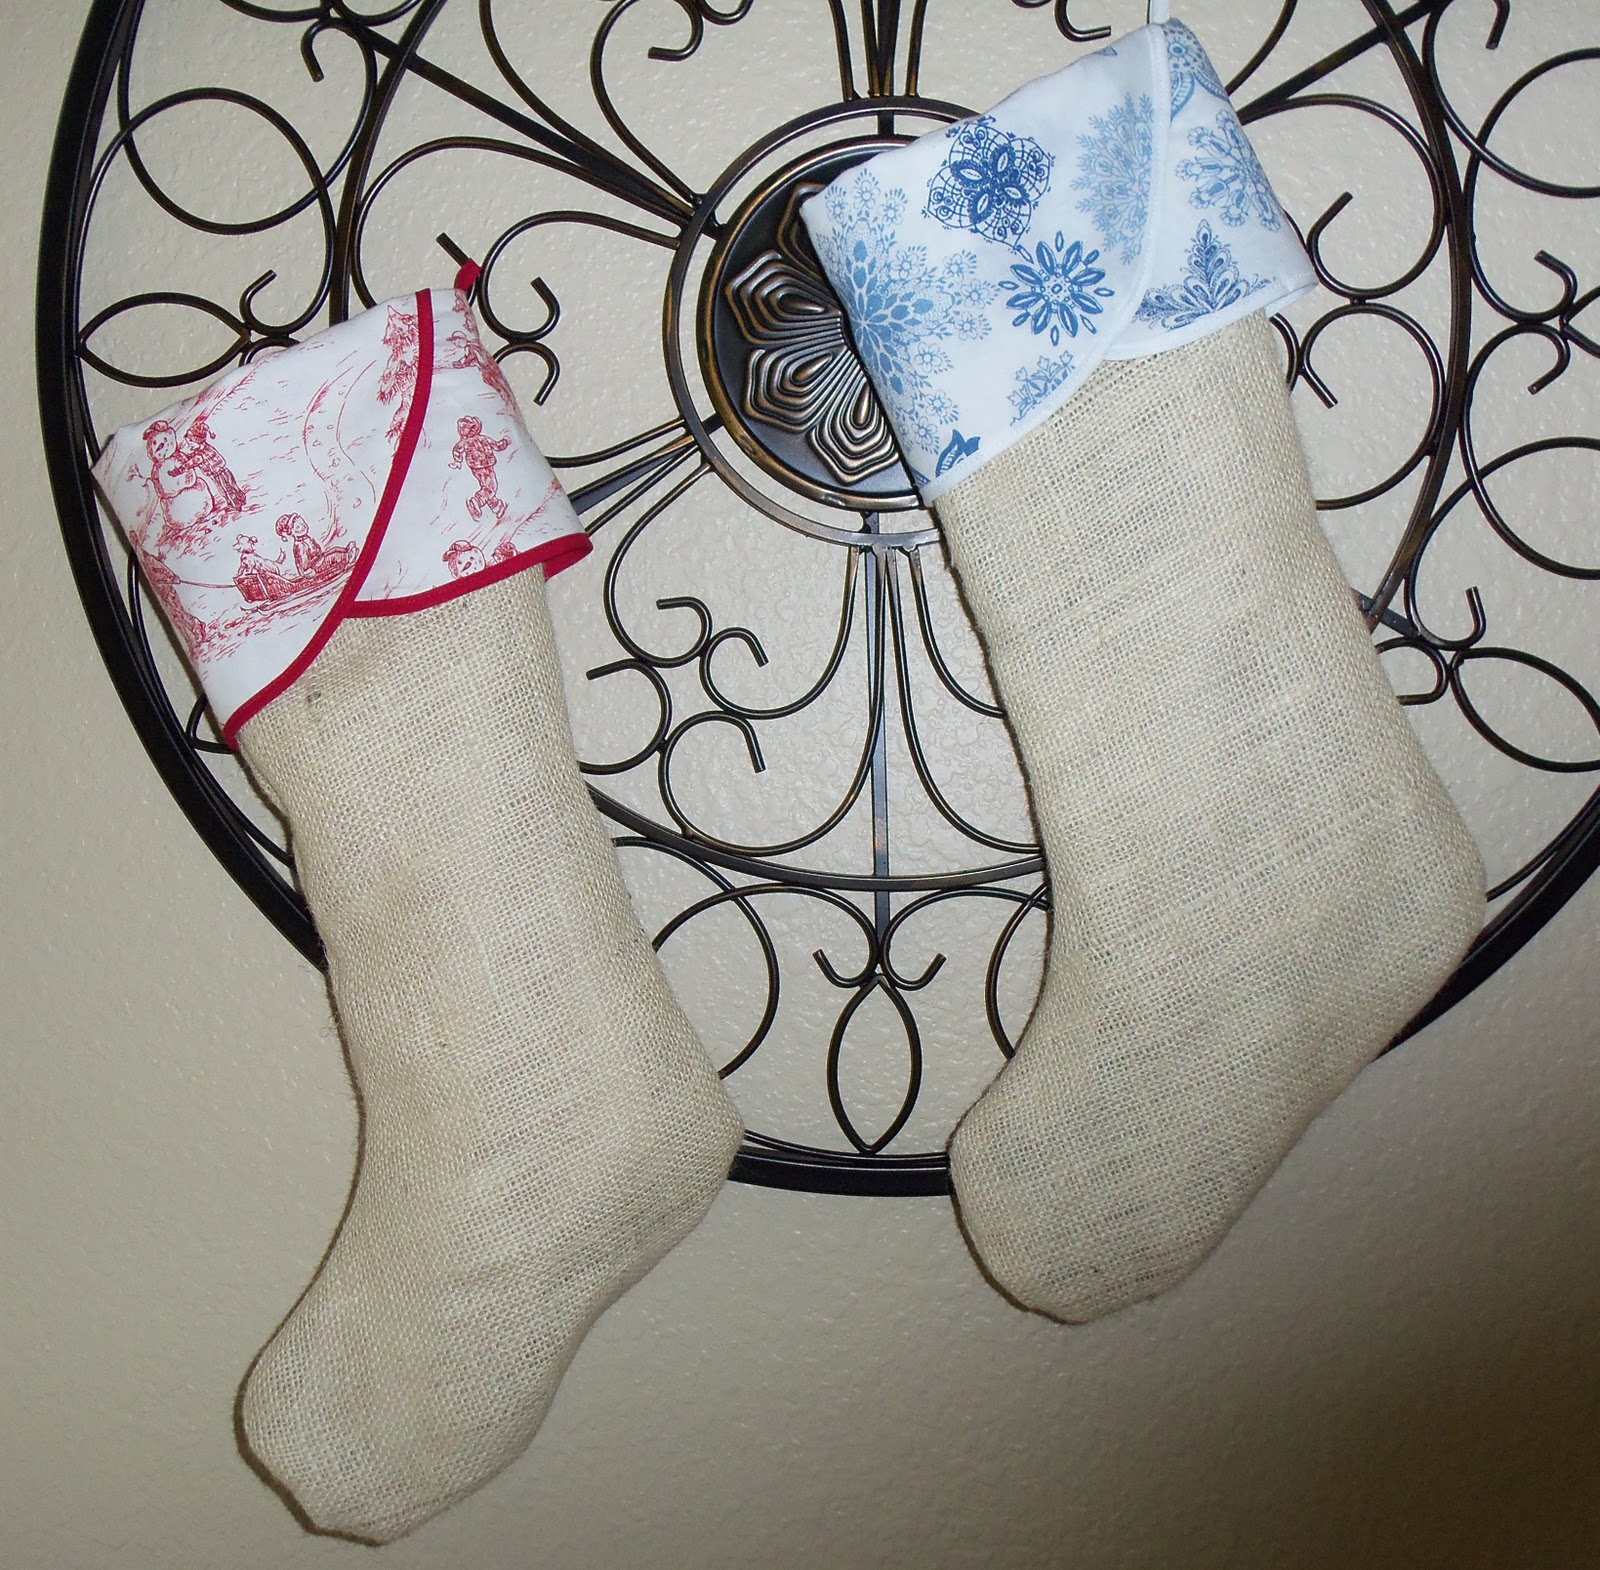
OK, I know Christmas is over, but this is what I made Christmas Eve so Santa would have somewhere to put presents for the kids. So, you can either get a head start for next year or save this idea to use later. The outside of the stockings are burlap and the insides are lined with the same fabric I used to make the cuffs. Don’t you just love the Christmas toile prints? I plan to either add three buttons down the part of the cuff that overlaps or find some monogram pins. Too bad I can’t find monogram buttons anywhere.
1. To get started, first you need to make a pattern for yourself. I used some large sketch paper that I had laying around and traced a cheap stocking that I had. Make sure to add another 1/2″ all around for you seams. You will also need a pattern for the cuff. See pictures below to see the overall shape that it should be.
2. Line the pattern up so that the top of the stocking is on the selvage edge of the burlap and cut. That way, you don’t have to worry about the top fraying. You will need to cut two of these. (If you are using something other than burlap, make sure to flip the pattern over to cut the next piece and you will need to hem the top some other way.)
3. Pin the two pieces together and sew a 1/2″ seam all around except for the top. Go back with a zigzag stitch to ensure that the burlap will not fray. (If you are using a fabric other than burlap, sew right sides together.)
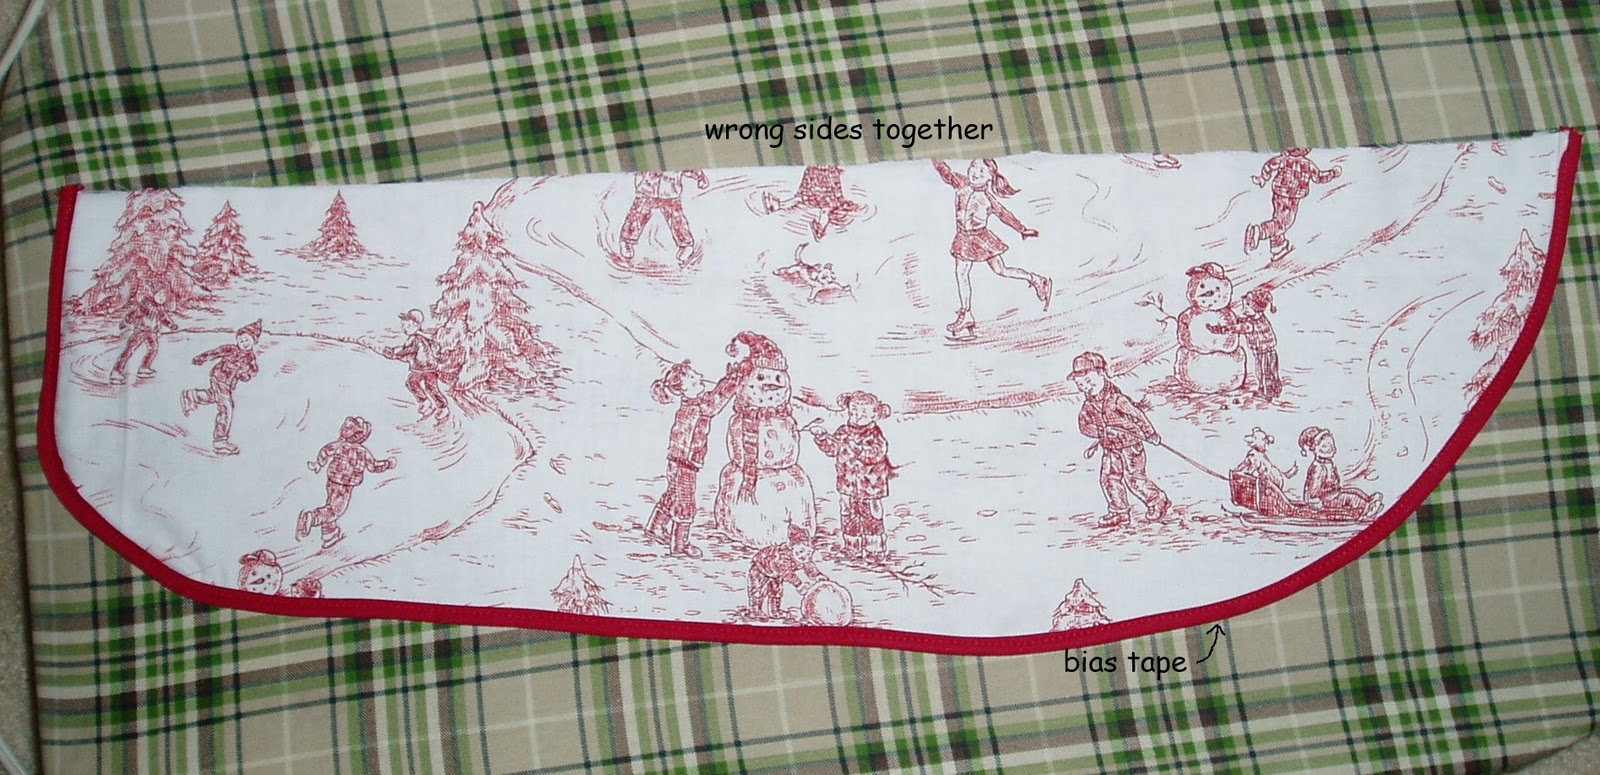
4. Line up your cuff pattern for the second fabric on the part that you want to show on the front of the stocking. Flip your pattern over, and cut another piece. Put wrong sides together, and sew on double fold bias tape.
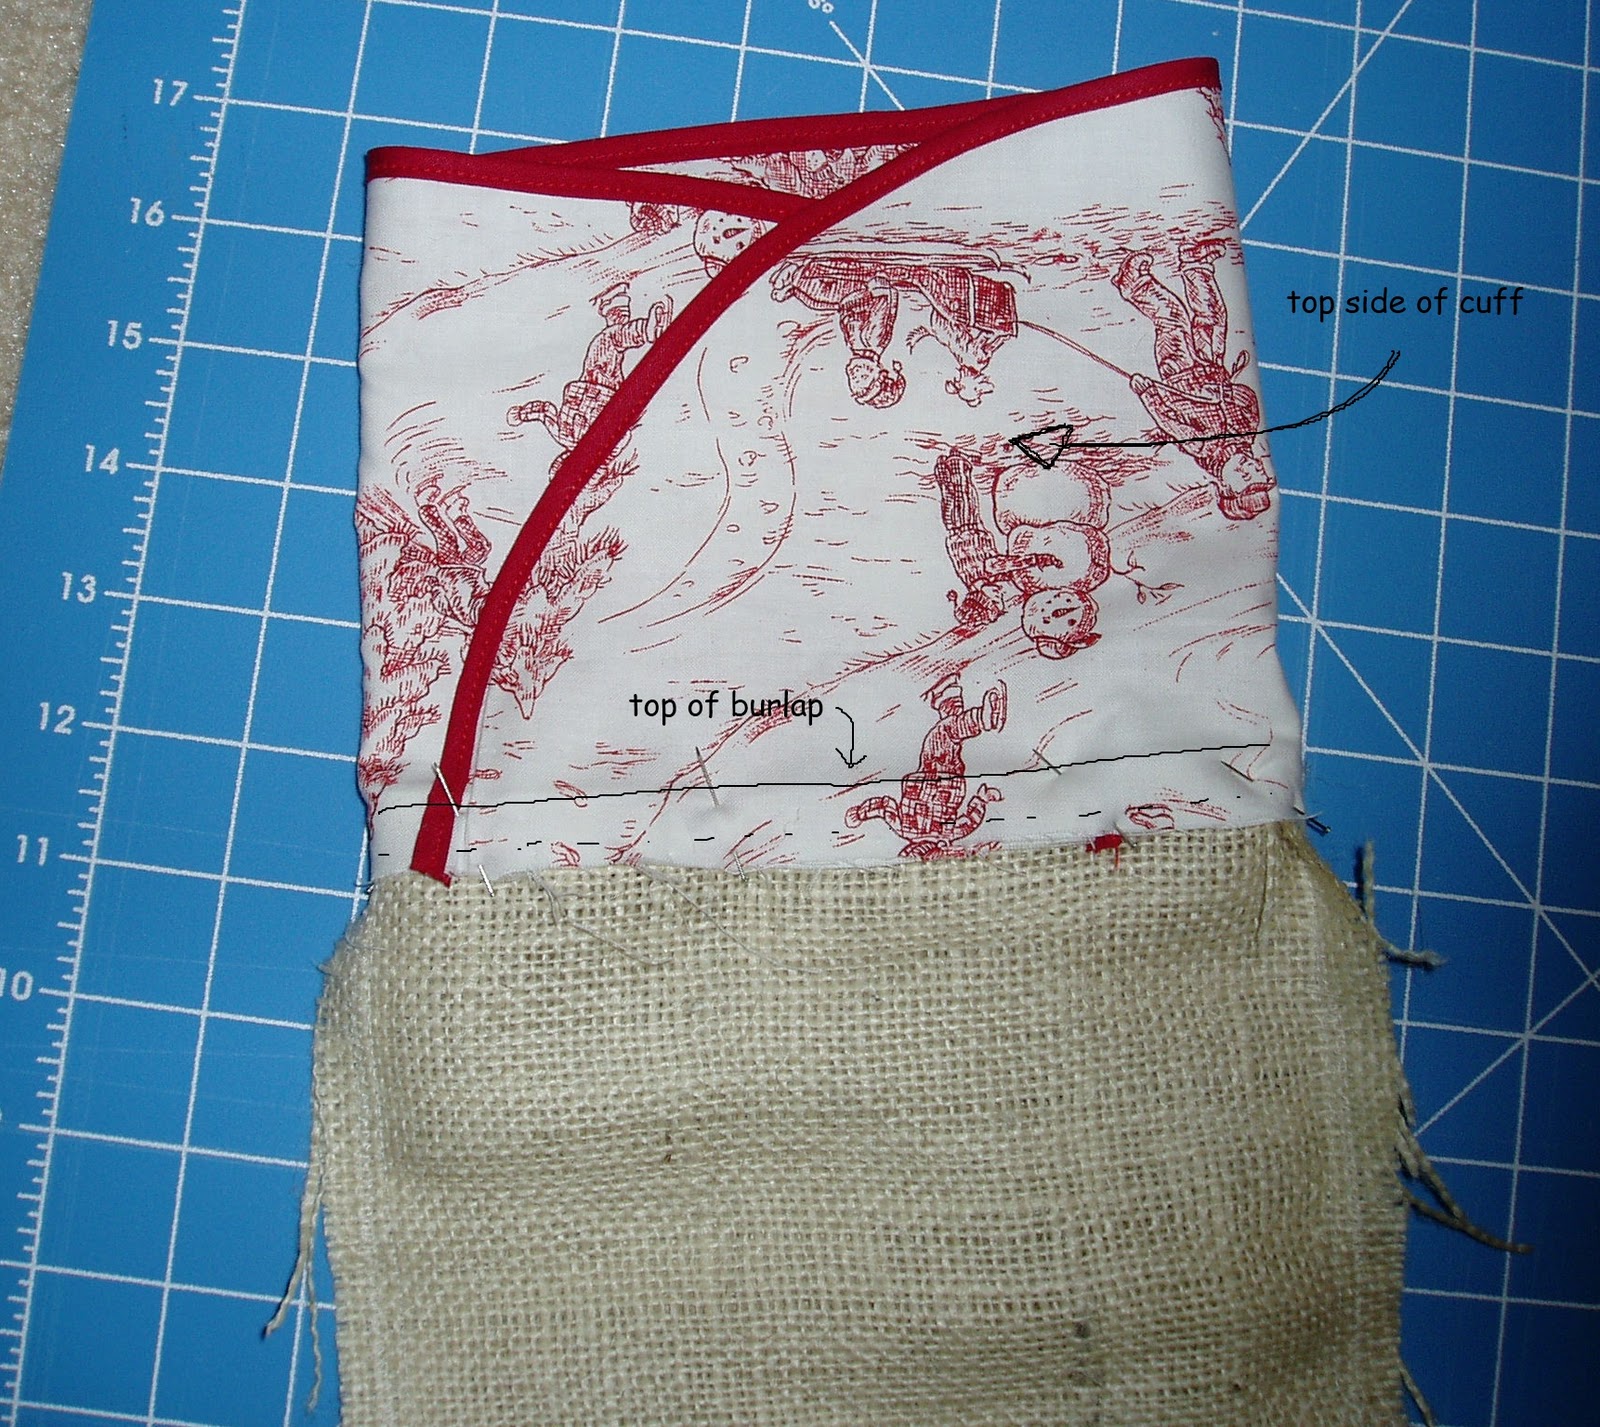
5. Pin the cuff to the inside out burlap portion of the stocking. This is where it gets kind of tricky. You may want to turn the burlap portion of the stocking right-side out to line up where you want to place the cuff and then turn it wrong side out again to pin it on. The unfinished edge of the cuff should be on the inside of the stocking when everything is done. Look at the picture below to get a better idea.
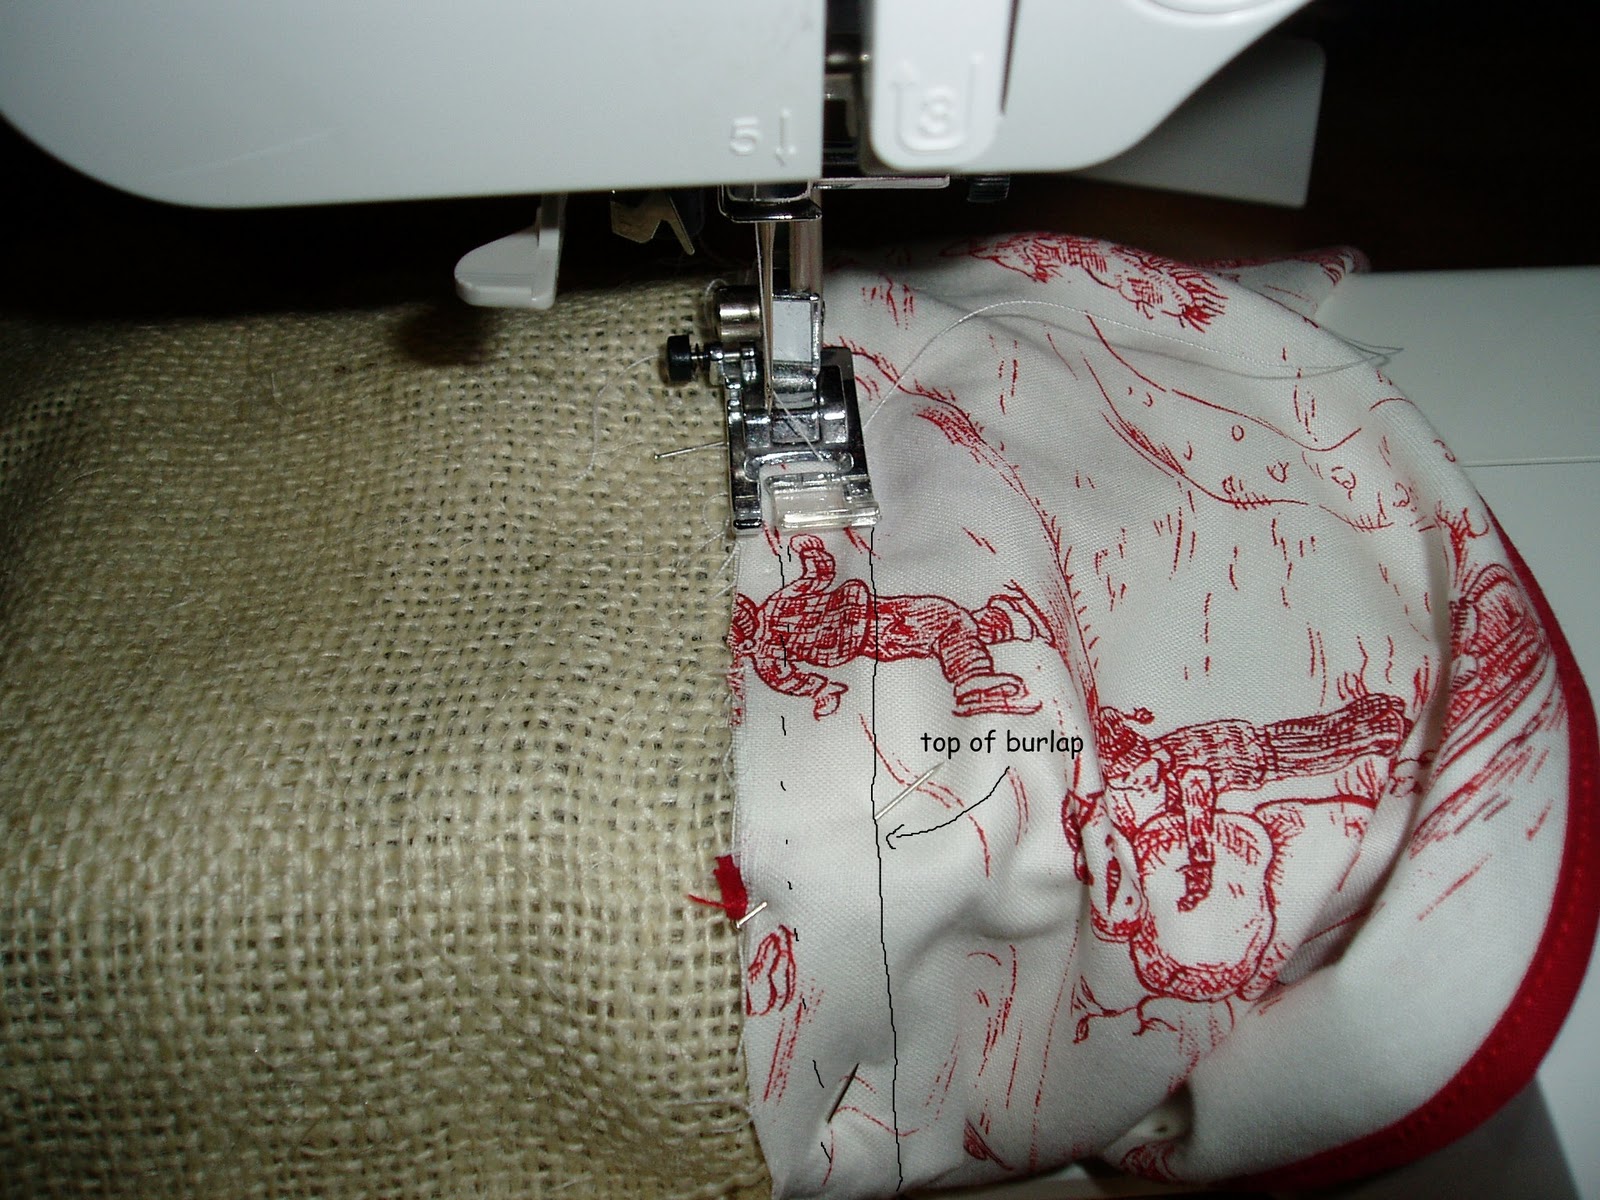
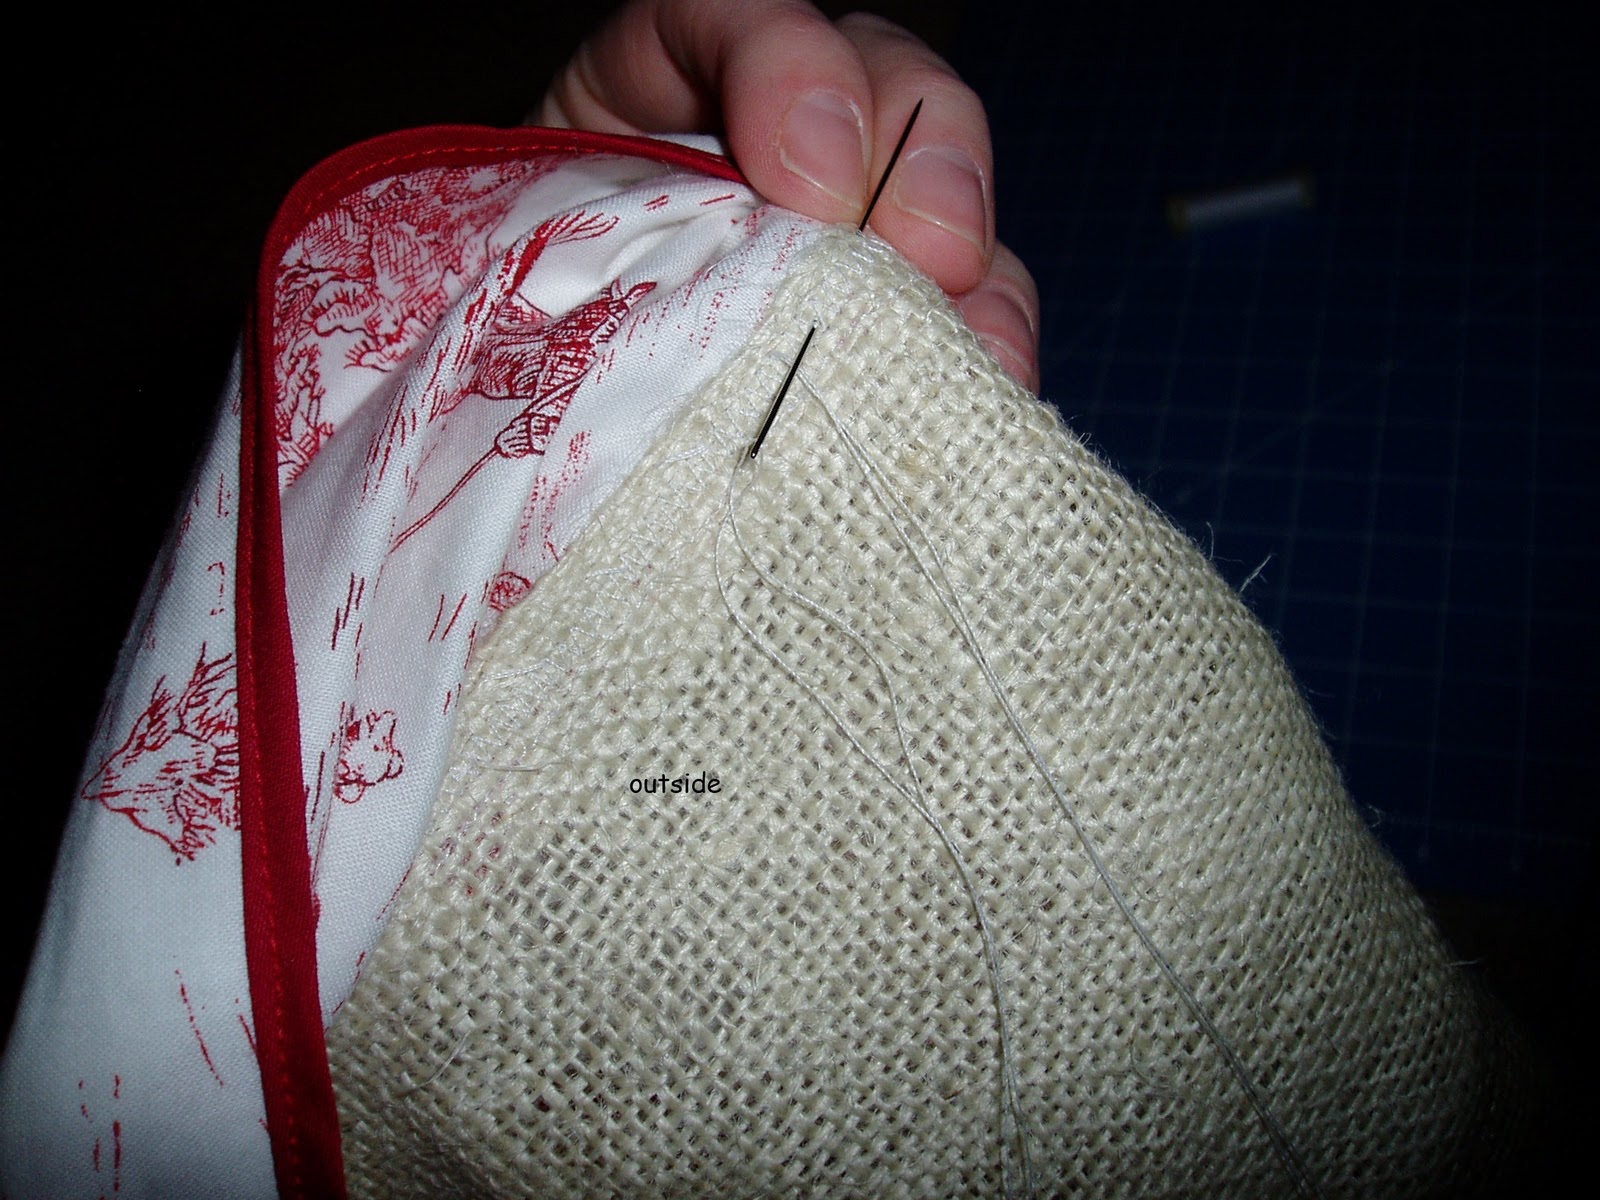
6. Sew the cuff to the top of the burlap stocking. To do this by machine, you need to be able to pull the stocking over the base of your machine and sew around until you reach the starting point again. Am I making any sense? I also did another zigzag stitch to make sure nothing frays here.
7. I neglected to take a picture of this step, but you will need to make a loop to hang your stocking. To do this, I cut a piece of bias tape about 6″ long (you can trim it later) and sewed it shut. Make a loop with the bias tape and sew the two ends to the inside of the stocking on the part you want to hang it.
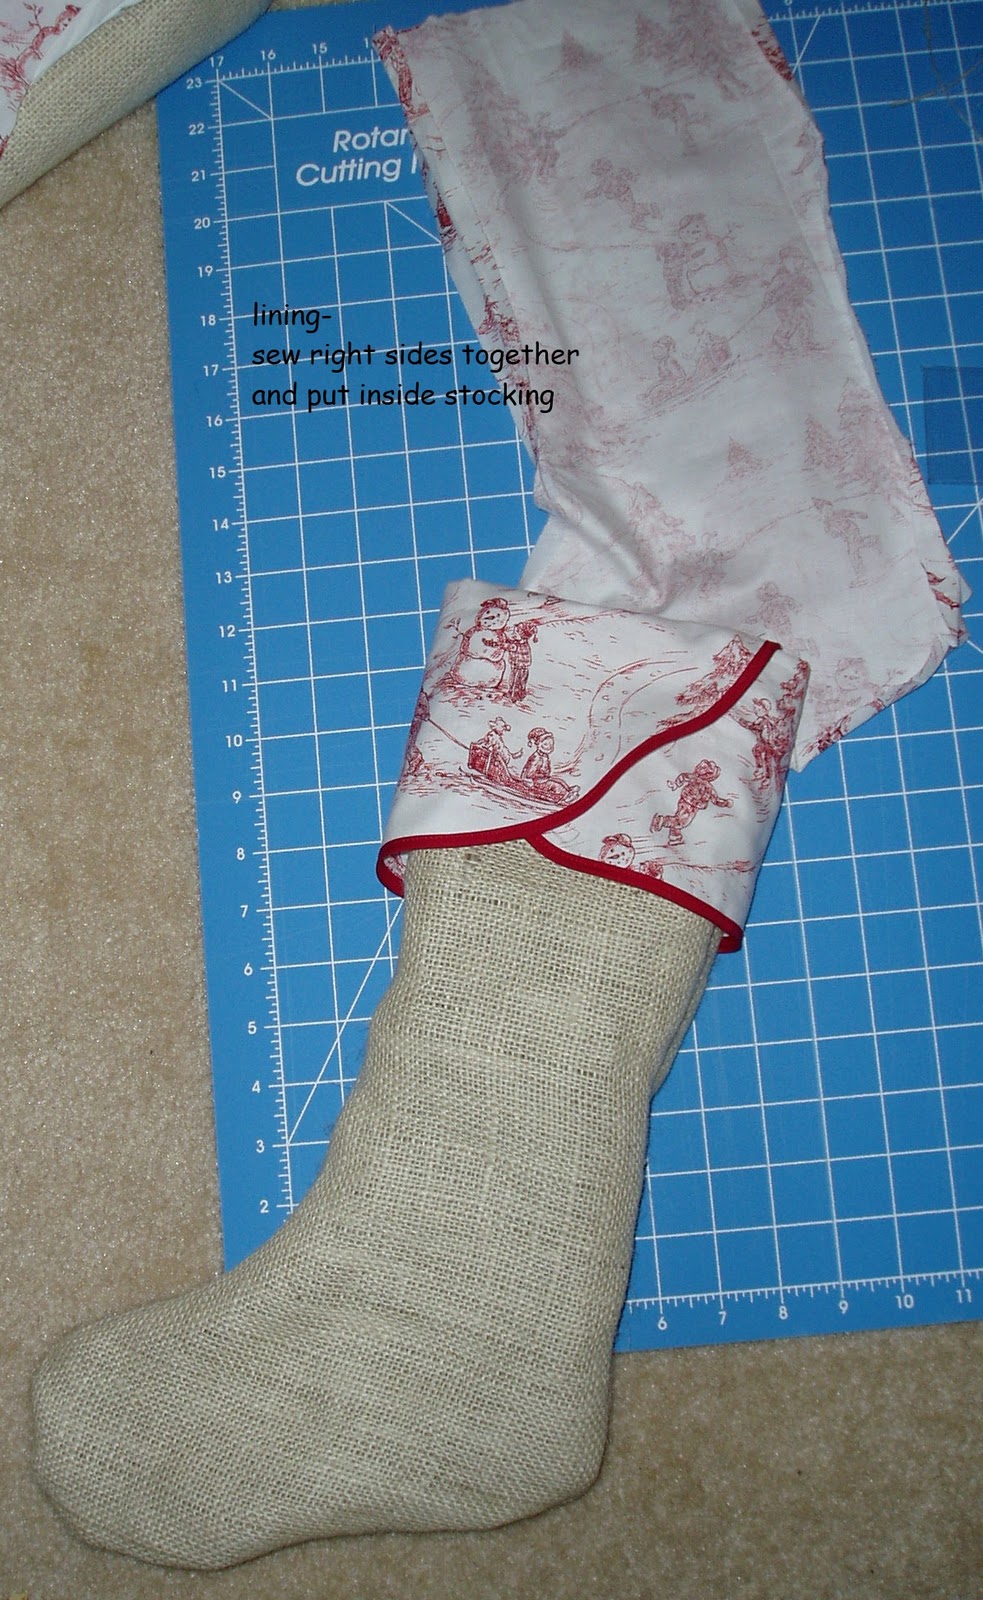
8. Cut out two of your stocking pattern in the same fabric you used for the cuff. Be sure to flip the pattern over for the second one. Pin and sew together with 1/2″ seam just like you did for the burlap part. Make sure to sew right sides together.
9. Turn outer part of stocking right side out and put lining inside.
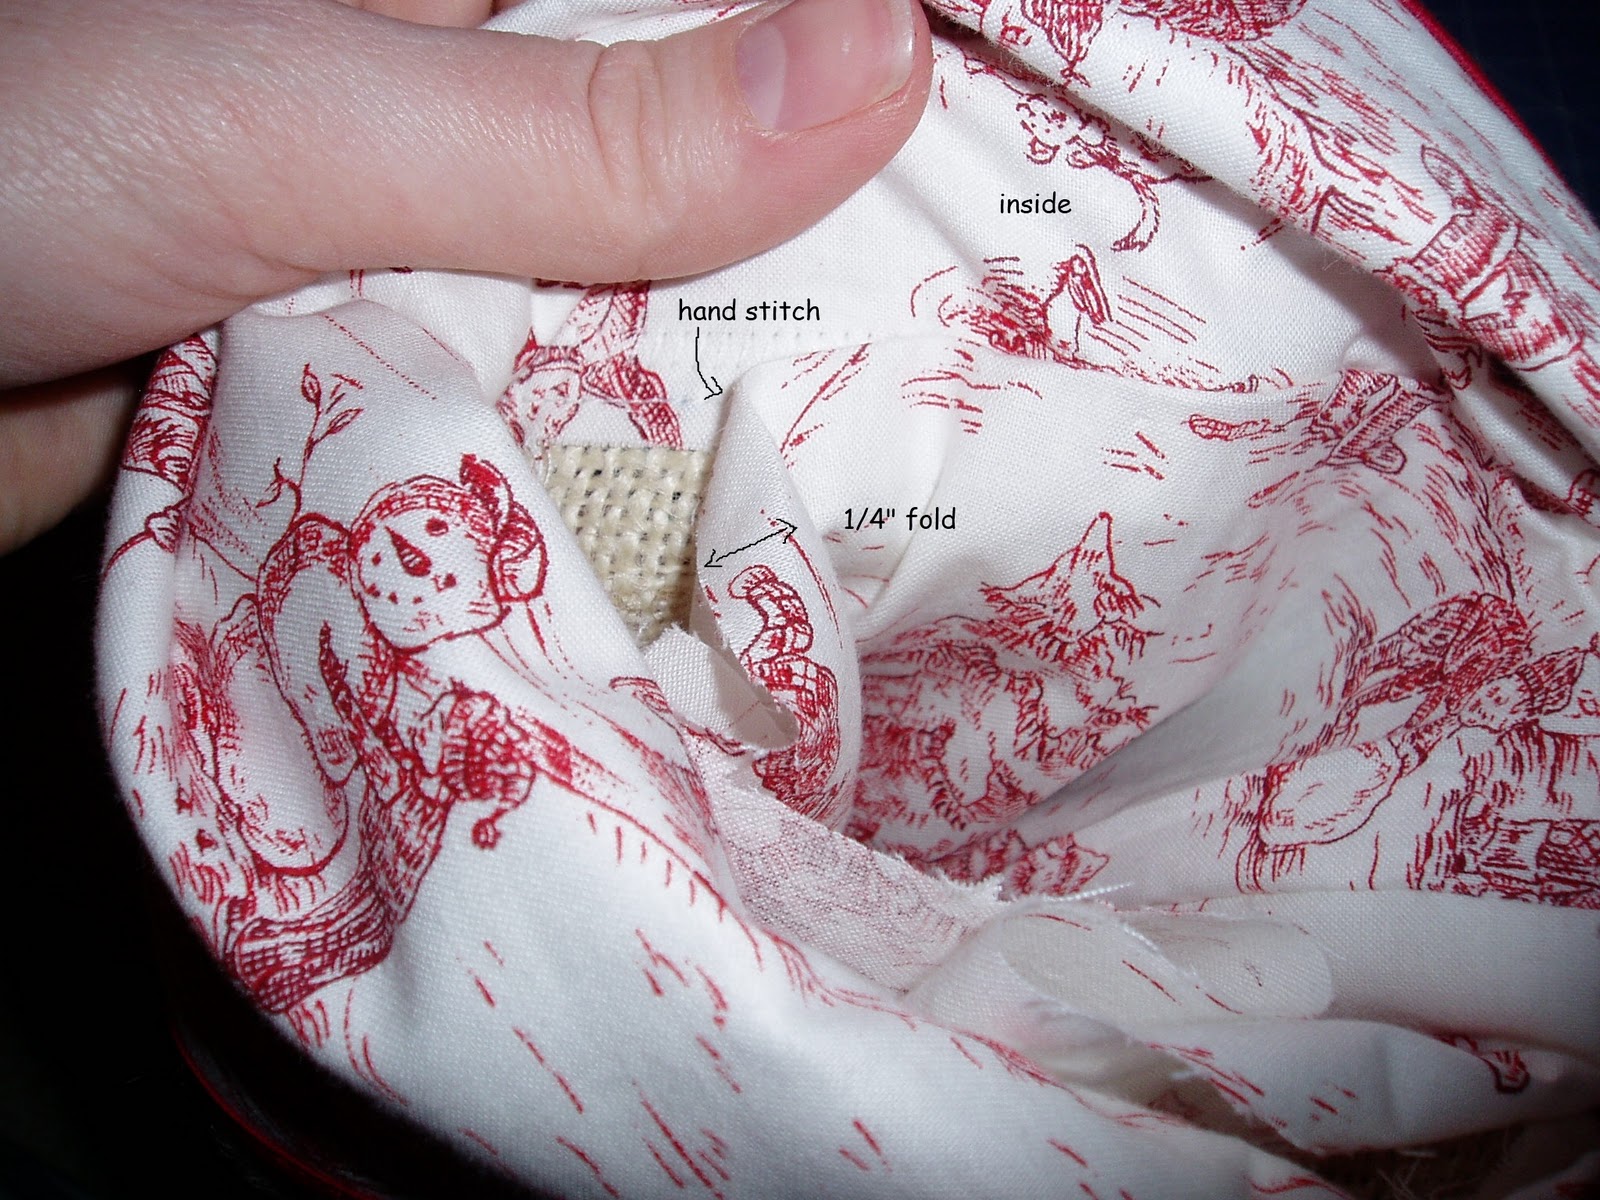
10. Fold over top of lining about 1/4″ and hand stitch to burlap portion of stocking. If you don’t want your stitches to show, sew only through the folded part of your lining.

Here is a rough outline of how everything should go together. Sorry if the last sketch looks like a diagram from 6th grade anatomy class. 🙂 It’s what I sketched to really help me piece it together.
After I made the first one, the second took no time at all! Hope everyone had a Merry Christmas!
**Edit: to see an updated tutorial with a free pattern click
here.**


Ooooo! I love these and I am going to ask Rob’s mom to make them for my kids lol 🙂 Your blog has so many cute things on it! You’ve been so busy!!! xoxo
I picked up the blue one Jo-Ann’s, and I ordered the red one from an etsy shop called krispybanana. 🙂
I love them!!! Where did you find those toile prints?
and THANK YOU! for posting your quiet book templates!